One commonly asked question is can I delete the WinSxS folder to regain some disk space? The short answer is no. However, there are ways to reduce the size of the WinSxS folder.
The component store (WinSxS folder) contains all the components that make-up Windows to allow you operate your system. These components are kept to rollback any problematic change or to repair a file that becomes corrupted.
The WinSxS folder is located in the Windows folder, for example “C:\Windows\WinSxS”. It’s the location for Windows Component Store files. The Windows Component Store is used to support the functions needed for the customization and updating of Windows. Here are some examples of how the Windows Component Store files are used:
- Using Windows Update to install new component versions. This keeps systems secure and up-to-date.
- Enabling or disabling Windows features.
- Adding roles or features using Server Manager.
- Moving systems between different Windows Editions.
- System recovery from corruption or boot failures
- Uninstalling problematic updates
- Running programs using side-by-side assemblies
Windows 10 and Windows Server 2016 automatically reduces the size of the WinSxS by using methods similar to the ones described in this tutorial, however these methods also include internal processes, such as uninstalling and deleting packages with components that have been replaced by other components with newer versions. Previous versions of some components are kept on the system for a period of time, allowing you to rollback if necessary. After a period of time, these components are removed from the installation.
In Windows 10 and Windows Server 2016, you have a number of ways to start the cleanup of the component store, which use a combination of package deletion and component compression to clean up the WinSxS folder.
For more information about the Windows Component Store (WinSxS folder), see:
- Manage the Component Store | Microsoft Docs
- Determine the Actual Size of the WinSxS Folder | Microsoft Docs
- Clean Up the WinSxS Folder | Microsoft Docs
This tutorial will show you different ways on how to clean up the Component Store (WinSxS folder) to reduce its size in Windows 10.
You must be signed in as an administrator to clean up the component store (WinSxS folder).
If you like, you can analyze the Component Store (WinSxS folder) first to see if it is recommended to clean up or not.
- Option One: Clean Up Component Store (WinSxS folder) using StartComponentCleanup Task
- Option Two: Clean Up Component Store (WinSxS folder) using /StartComponentCleanup with Dism Command
- Option Three: Clean Up Component Store (WinSxS folder) using /StartComponentCleanup and /ResetBase with Dism Command
- Option Four: Clean Up Component Store (WinSxS folder) using /SPSuperseded with Dism Command
Clean Up Component Store (WinSxS folder) using StartComponentCleanup Task
The StartComponentCleanup task was created in Windows 8 to regularly clean up components automatically when the system is not in use. This task is set to run automatically when triggered by the operating system. When run automatically, the task will wait at least 30 days after an updated component has been installed before uninstalling the previous versions of the component.
If you choose to run this task, the task will have a 1 hour timeout and may not completely clean up all files.
The StartComponentCleanup task can also be started from an elevated command prompt:
schtasks.exe /Run /TN "\Microsoft\Windows\Servicing\StartComponentCleanup"
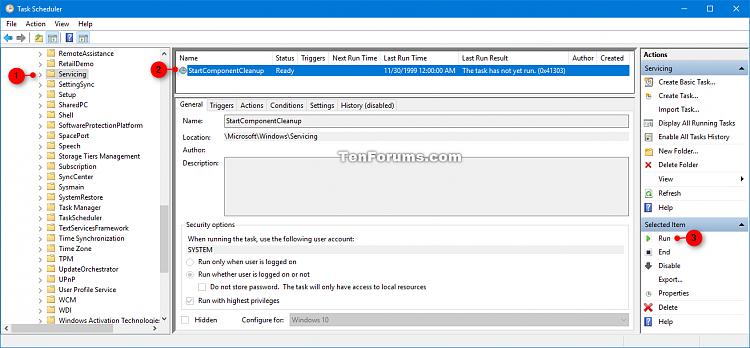
3 In the middle pane of Servicing, select the StartComponentCleanup task, and click/tap on Run under Selected Item in the right pane. (see screenshot below)
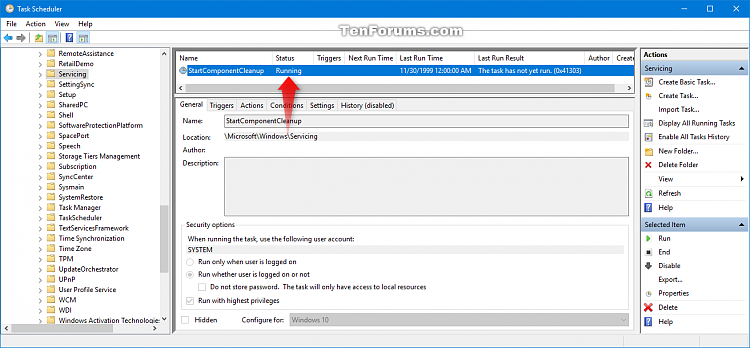
4 The StartComponentCleanup task will now be running until finished. This may take a while to finish running. (see screenshot below)
Clean Up Component Store (WinSxS folder) using /StartComponentCleanup with Dism Command
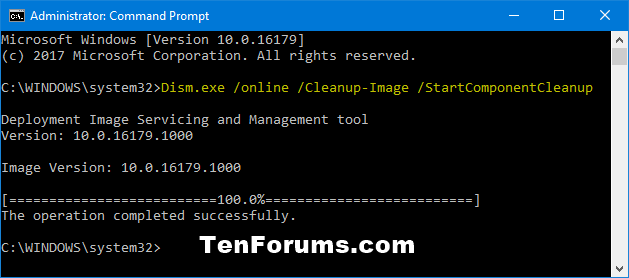
Using the /StartComponentCleanup parameter of Dism.exe on a running version of Windows 10 gives you similar results to running the StartComponentCleanup task in Task Scheduler, except previous versions of updated components will be immediately deleted (without a 30 day grace period) and you will not have a 1-hour timeout limitation.
Dism.exe /online /Cleanup-Image /StartComponentCleanup3 When finished, you can close the elevated command prompt if you like. This may take a while to finish running.
Clean Up Component Store (WinSxS folder) using /StartComponentCleanup and /ResetBase with Dism Command
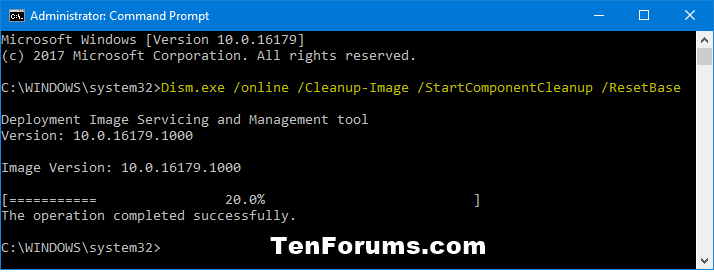
Using the /ResetBase switch with the /StartComponentCleanup parameter of DISM.exe on a running version of Windows 10 removes all superseded versions of every component in the component store.
All existing service packs and updates cannot be uninstalled after this command is completed. This will not block the uninstallation of future service packs or updates.
Dism.exe /online /Cleanup-Image /StartComponentCleanup /ResetBase3 When finished, you can close the elevated command prompt if you like. This may take a while to finish running.
Clean Up Component Store (WinSxS folder) using /SPSuperseded with Dism Command
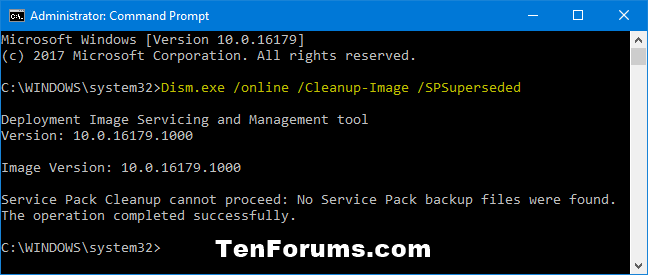
To reduce the amount of space used by a Service Pack, use the /SPSuperseded parameter of Dism.exe on a running version of Windows 10 to remove any backup components needed for uninstallation of the service pack. A service pack is a collection of cumulative updates for a particular release of Windows.
This option will most likely never be needed for Windows 10 since service packs are no longer used for Windows 10.
The service pack cannot be uninstalled after this command is completed.
Dism.exe /online /Cleanup-Image /SPSuperseded3 When finished, you can close the elevated command prompt if you like. This may take a while to finish running.
